In WooCommerce, the data tables we work with most often are the product list and the order list. In this in-depth tutorial, we will learn how to manage data table columns for orders and products inside the WooCommerce dashboard. This is very similar to managing post or page list table columns elsewhere in the WordPress dashboard, but there are some important differences.
We will also look at different examples. For instance, we are going to add a “Total Sales” column to the product list, as shown below:
 We added a sortable “Total Sales” column to the WooCommerce product list in the dashboard. You can jump directly to that example.
Which hook should you use?
Depending on which WooCommerce admin screen you want to add a custom column to, such as the order list, product list, and so on, the implementation can differ slightly and the hooks we need will also be different. Let us first look at the hooks available. You can also jump directly to the examples.
In addition to the hooks used to manage the columns themselves, we also need some hooks to populate the columns with data. We will go through them step by step.
Add columns
First, we need to add an empty column to the list table. The following hook list can help you do that.
| Hook | Admin screen |
|---|---|
manage_edit-shop_order_columns |
Use for CPT-based orders |
manage_woocommerce_page_wc-orders_columns |
Use for HPOS-based orders |
manage_edit-product_columns |
Products |
manage_edit-product_cat_columns |
Product categories |
manage_edit-product_tag_columns |
Product tags |
manage_users_columns |
Users |
I also want to emphasize one thing about WooCommerce orders. It is very likely that you are using a recent WooCommerce version with HPOS enabled by default. That means WooCommerce orders are no longer stored as a custom post type, so the manage_edit-shop_order_columns hook will not work for you. Do not worry. Just use manage_woocommerce_page_wc-orders_columns instead, and look at the example below, where we create a WooCommerce column for orders that works for both HPOS-based and CPT-based orders.
Now let us look at a simple example. Regardless of which hook you use, the code looks mostly the same. We just add one more item to the $columns array containing the column ID and title, in the format array( 'column_id' => 'column_title' ).
add_filter( 'manage_woocommerce_page_wc-orders_columns', 'wprs_new_column' );
function wprs_new_column( $columns ){
	// Add a new column here
	$columns[ 'wprs_new_column' ] = 'My new column';

	// return the modified array
	return $columns;
}
That is all. The column has been added. This same group of hooks is also useful when we want to remove a column.
Populate custom columns with data
After the previous step, we have only added a table header. We still need to output data inside the column so the table actually displays the information we need.
| Hook | Admin screen |
|---|---|
manage_posts_custom_column |
Products and CPT-based orders |
manage_woocommerce_page_wc-orders_custom_column |
HPOS-based orders |
manage_product_cat_custom_column |
Product categories |
manage_product_tag_custom_column |
Product tags |
manage_users_custom_column |
Users |
The callback functions for these hooks are not the same. For example, for products and orders, we print the result inside the function, but for users, tags, and categories, we return the result instead.
Users, product categories, and product tags:
// for users
// add_filter( 'manage_users_custom_column', 'wprs_populate_columns', 10, 3 );
// for product categories
// add_filter( 'manage_product_cat_custom_column', 'wprs_populate_columns', 10, 3 );
// for product tags
add_filter( 'manage_product_tag_custom_column', 'wprs_populate_columns', 10, 3 );

function wprs_populate_columns( $output, $column_name, $object_id ) {
	// $object_id is either the user ID or product category/tag ID

	if( 'column ID here' === $column_name ) {
        // you can use switch()
		// do something and write the result into $output
		$output .= 'some column data here';
	}

	return $output;
}
Products and CPT-based orders:
// products and legacy orders (CPT-based)
add_action( 'manage_posts_custom_column', 'wprs_populate_columns' );

function wprs_populate_columns( $column_name ){

	global $post, $the_order;

	if( 'column ID here' === $column_name ) {
		// do something and print the result
		echo 'some column data here';
	}

}
HPOS-based orders:
add_action( 'manage_woocommerce_page_wc-orders_custom_column', 'wprs_populate_orders_column', 25, 2 );

function wprs_populate_orders_column( $column_name, $order ){ // WC_Order object is available as $order variable here

	if( 'column ID here' === $column_name ) {
		// do something and print the result
		echo 'some column data here';
	}

}
Now we have finished the theory part. If you want to see examples, you can jump directly to the examples section.
How do you remove a column?
Sometimes admin screens contain too many columns, and we may need to clean things up a little by removing the ones we do not need. Of course, we can also hide them through “Screen Options”, so do not forget about that.
Here are the steps:
- Decide which admin screen you want to remove the column from, then go to this chapter of the tutorial and choose the appropriate hook.
- Find the column ID. To do that, you can inspect the column in your browser.
- Then use the following code:
// replace 'manage_edit-product_columns' hook with the hook you need
add_filter( 'manage_edit-product_columns', 'wprs_remove_woo_columns' );
function wprs_remove_woo_columns( $columns ) {

	unset( $columns[ 'column ID here' ] );
	// for example unset( $columns[ 'product_cat' ] );
	return $columns;

}
Of course, if needed, we can also remove multiple columns at the same time.
How to create custom columns: examples
Example 1: Add a column to the order list
If we are using the latest version of WooCommerce, or if HPOS has been enabled in settings, then the manage_edit-shop_order_columns hook for order list columns will no longer work. Let us use the following example to see how to solve that.
Suppose we want to display the list of purchased products after the order status.
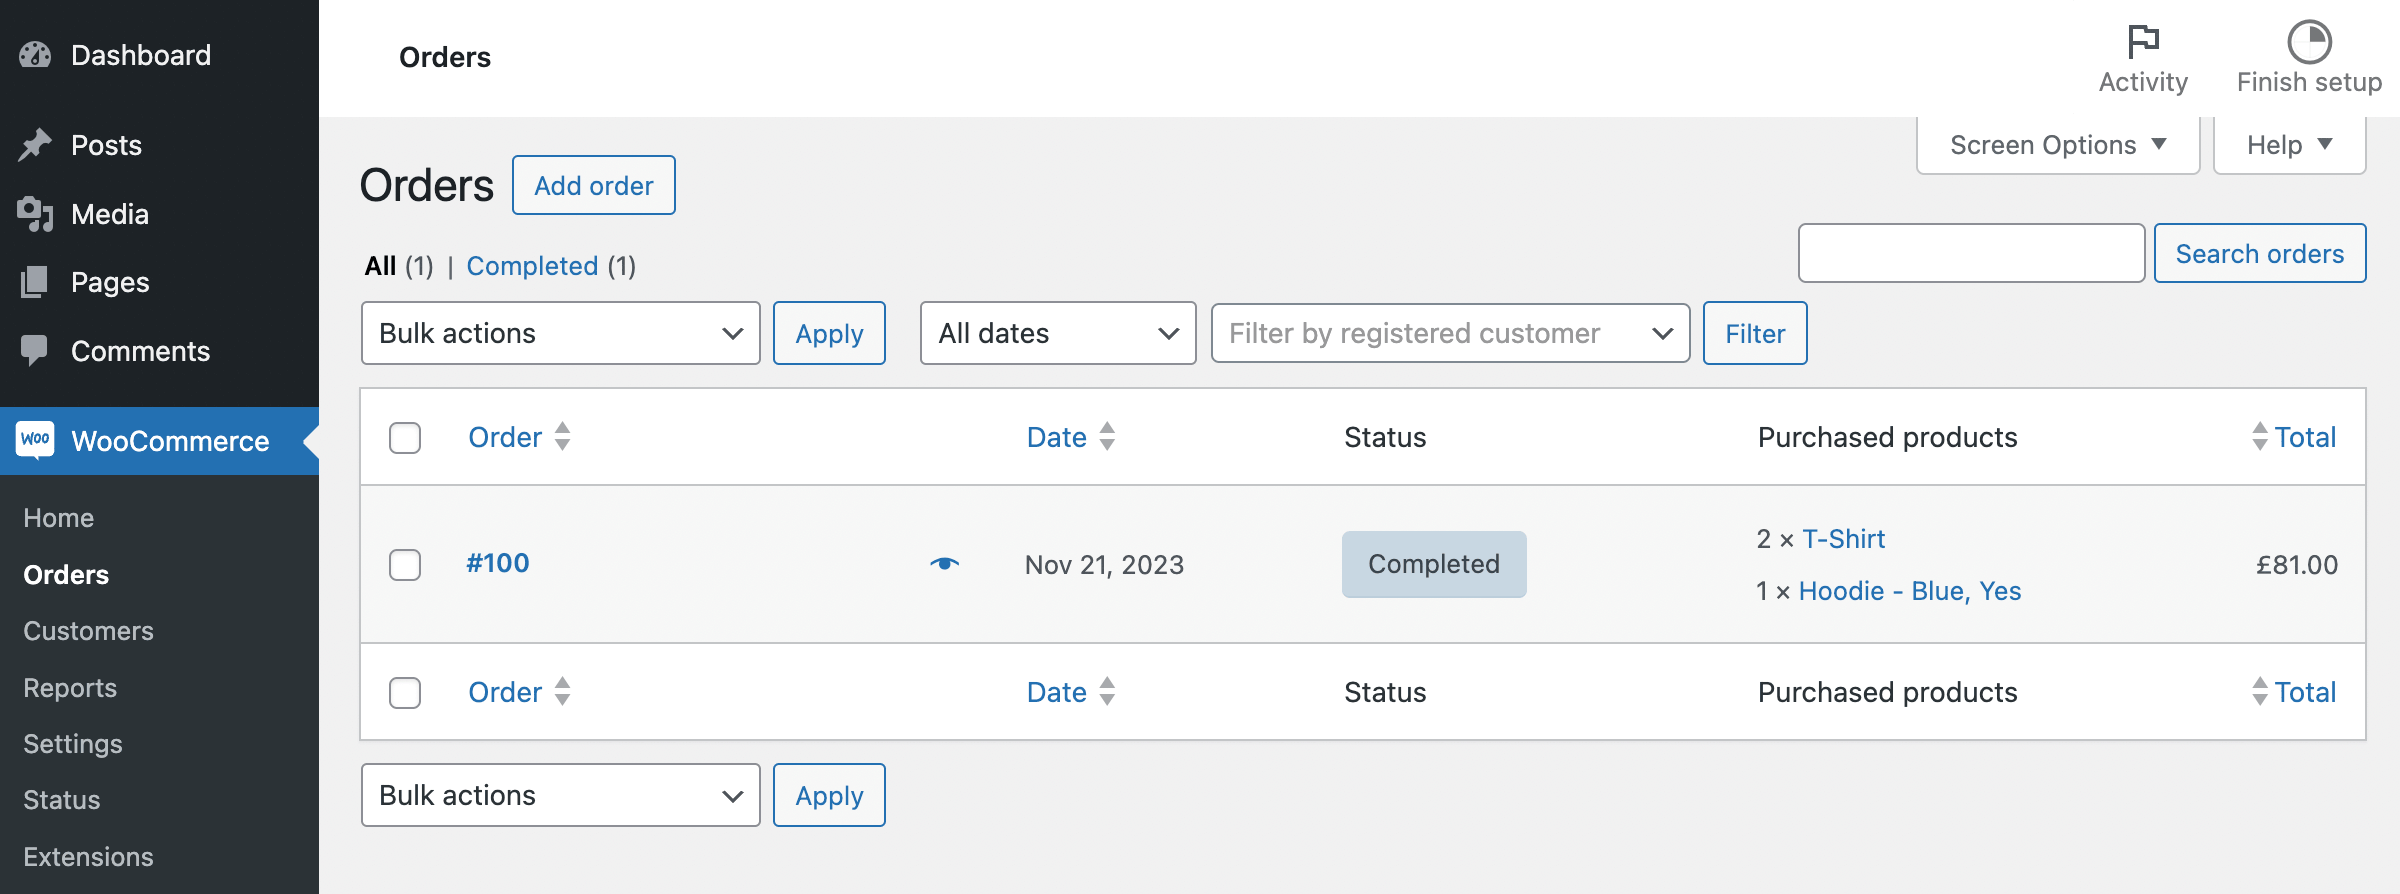
The following code works well for both legacy orders and HPOS-based orders:
// legacy – for CPT-based orders
add_filter( 'manage_edit-shop_order_columns', 'wprs_order_items_column' );
// for HPOS-based orders
add_filter( 'manage_woocommerce_page_wc-orders_columns', 'wprs_order_items_column' );

function wprs_order_items_column( $columns ) {

	// let's add our column before "Total"
	$columns = array_slice( $columns, 0, 4, true ) // 4 columns before
	+ array( 'order_products' => 'Purchased products' ) // our column is going to be 5th
	+ array_slice( $columns, 4, NULL, true );

	return $columns;

}

// legacy – for CPT-based orders
add_action( 'manage_shop_order_posts_custom_column', 'wprs_populate_order_items_column', 25, 2 );
// for HPOS-based orders
add_action( 'manage_woocommerce_page_wc-orders_custom_column', 'misha_populate_order_items_column', 25, 2 );
function wprs_populate_order_items_column( $column_name, $order_or_order_id ) {

	// legacy CPT-based order compatibility
	$order = $order_or_order_id instanceof WC_Order ? $order_or_order_id : wc_get_order( $order_or_order_id );

	if( 'order_products' === $column_name ) {

		$items = $order->get_items();
		if( ! is_wp_error( $items ) ) {
			foreach( $items as $item ) {
 				echo $item[ 'quantity' ] .' × <a href="' . get_edit_post_link( $item[ 'product_id' ] ) . '">'. $item[ 'name' ] .'</a><br />';
				// you can also use $order_item->variation_id parameter
				// by the way, $item[ 'name' ] will display variation name too
			}
		}

	}

}
Take a look at line 24. I think it is an interesting detail, because the second parameter of the hooks manage_shop_order_posts_custom_column and manage_woocommerce_page_wc-orders_custom_column is different. It is either an order ID or the corresponding order object. We use the condition $order_or_order_id instanceof WC_Order to check which case we are dealing with.
manage_shop_order_posts_custom_column is the full hook name. Unlike some other hooks, you do not replace custom_column with the column ID.Example 2: Add a column to the product list
In this example, we need to create a custom field named total_sales for each product and store the total sales count in it. Then we can use that value in the pre_get_posts hook and create a sortable column.
The result we want to create is shown below:
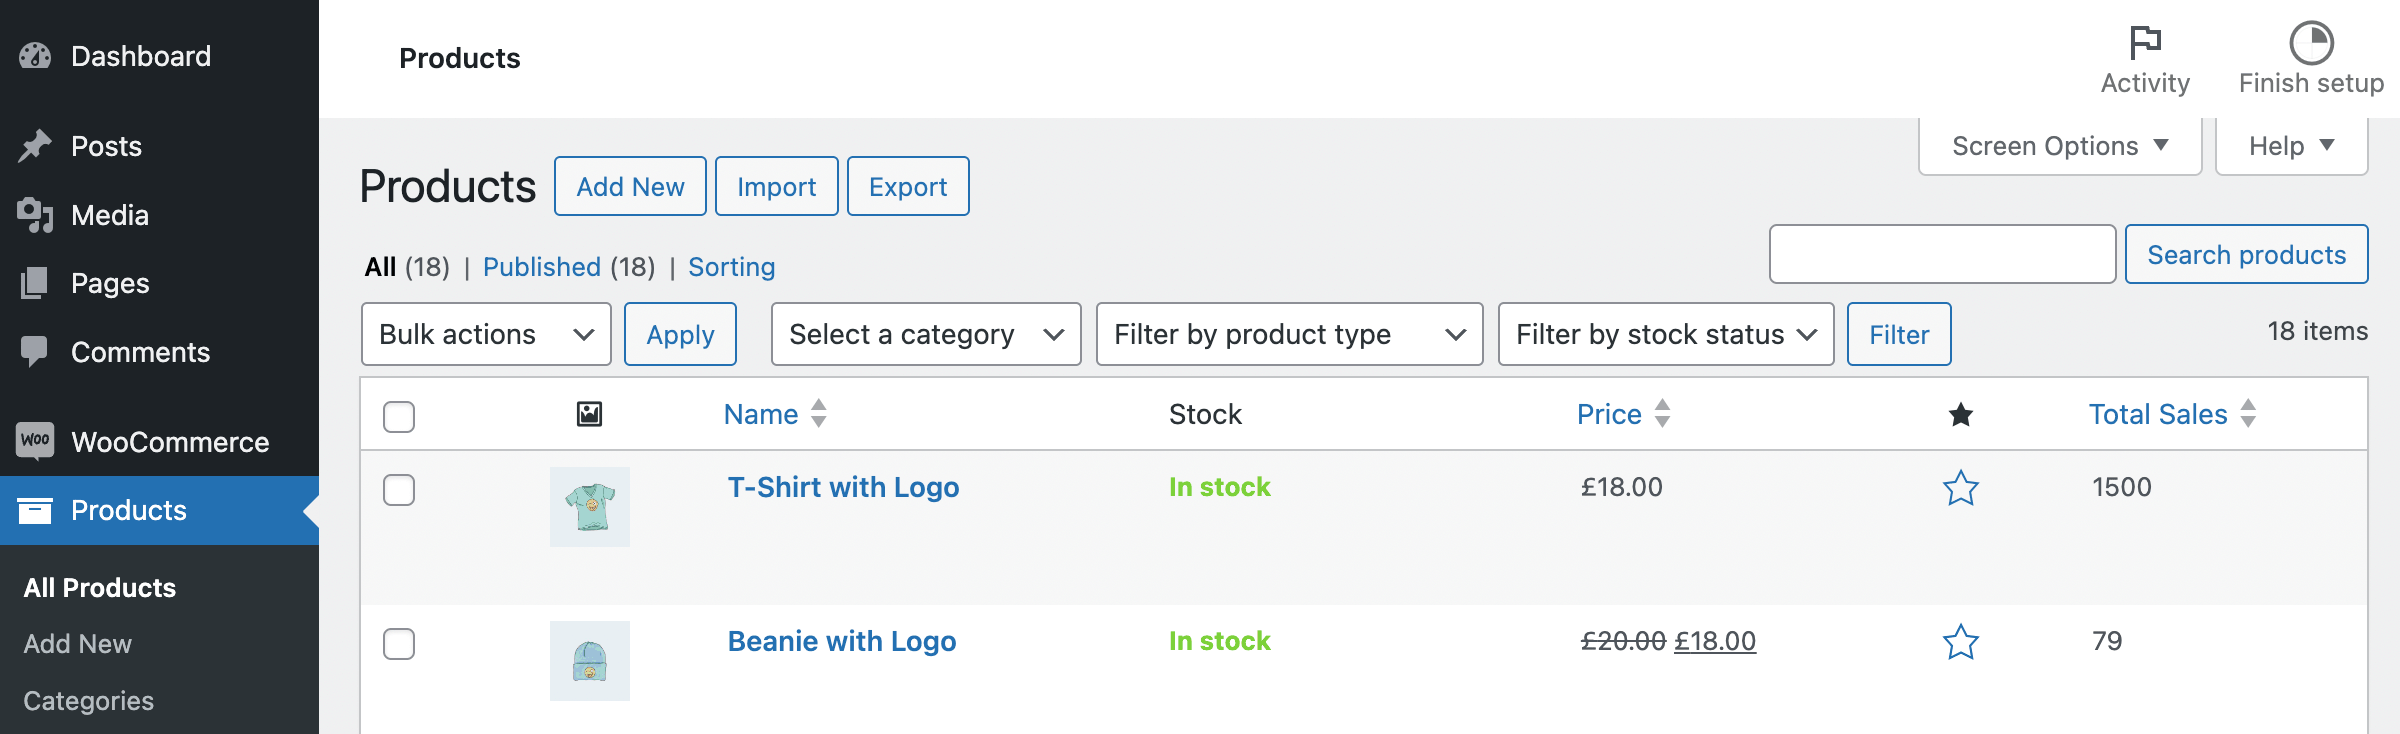 As you can see, the “Total Sales” column heading is clickable, which means the data in that column is sortable. Here is the code that implements it.
// add the column
add_filter( 'manage_edit-product_columns', 'wprs_add_product_list_column' );
function wprs_add_product_list_column( $column_name ) {

	// a slightly different way of adding a new column
	return wp_parse_args(
		array(
			'total_sales' => 'Total Sales'
		),
		$column_name
	);

}

// display column data
add_action( 'manage_posts_custom_column', 'wprs_populate_product_column', 25, 2 );
function wprs_populate_product_column( $column_name, $product_id ) {

	if( 'total_sales' === $column_name ) {
		echo get_post_meta( $product_id, 'total_sales', true );
	}

}

// make the column sortable
add_filter( 'manage_edit-product_sortable_columns', 'wprs_sortable_column' );
function wprs_sortable_column( $sortable_columns ) {

	return wp_parse_args(
		array(
			'total_sales' => 'by_total_sales' // column name => sortable arg
		),
		$sortable_columns
	);

}

// implement the sorting logic
add_action( 'pre_get_posts', function( $query ) {

	if( ! is_admin() || empty( $_GET[ 'orderby' ] ) || empty( $_GET[ 'order' ] ) ) {
		return $query;
	}

	if( 'by_total_sales' === $_GET[ 'orderby' ] ) {
		$query->set( 'meta_key', 'total_sales' );
		$query->set( 'orderby', 'meta_value_num' );
		$query->set( 'order', $_GET[ 'order' ] );
	}

	return $query;

} );
There is also another question: can we really use product metadata as regular post metadata? I mean using get_post_meta(), the pre_get_posts hook, and so on. If we had used that same approach for orders in the past, then it no longer works for HPOS orders. I think the answer here is yes, for now we can use that approach with products, because WooCommerce products are still meant to be stored as CPTs. Of course, maybe one day we will also face the issue of “high-performance product storage”, but I have not heard anything about that yet.
Example 3: Add a column containing WooCommerce billing details to the user management page
Finally, let us add one more column to the “Users > All Users” page. In that column, we are going to display the billing address, like this:
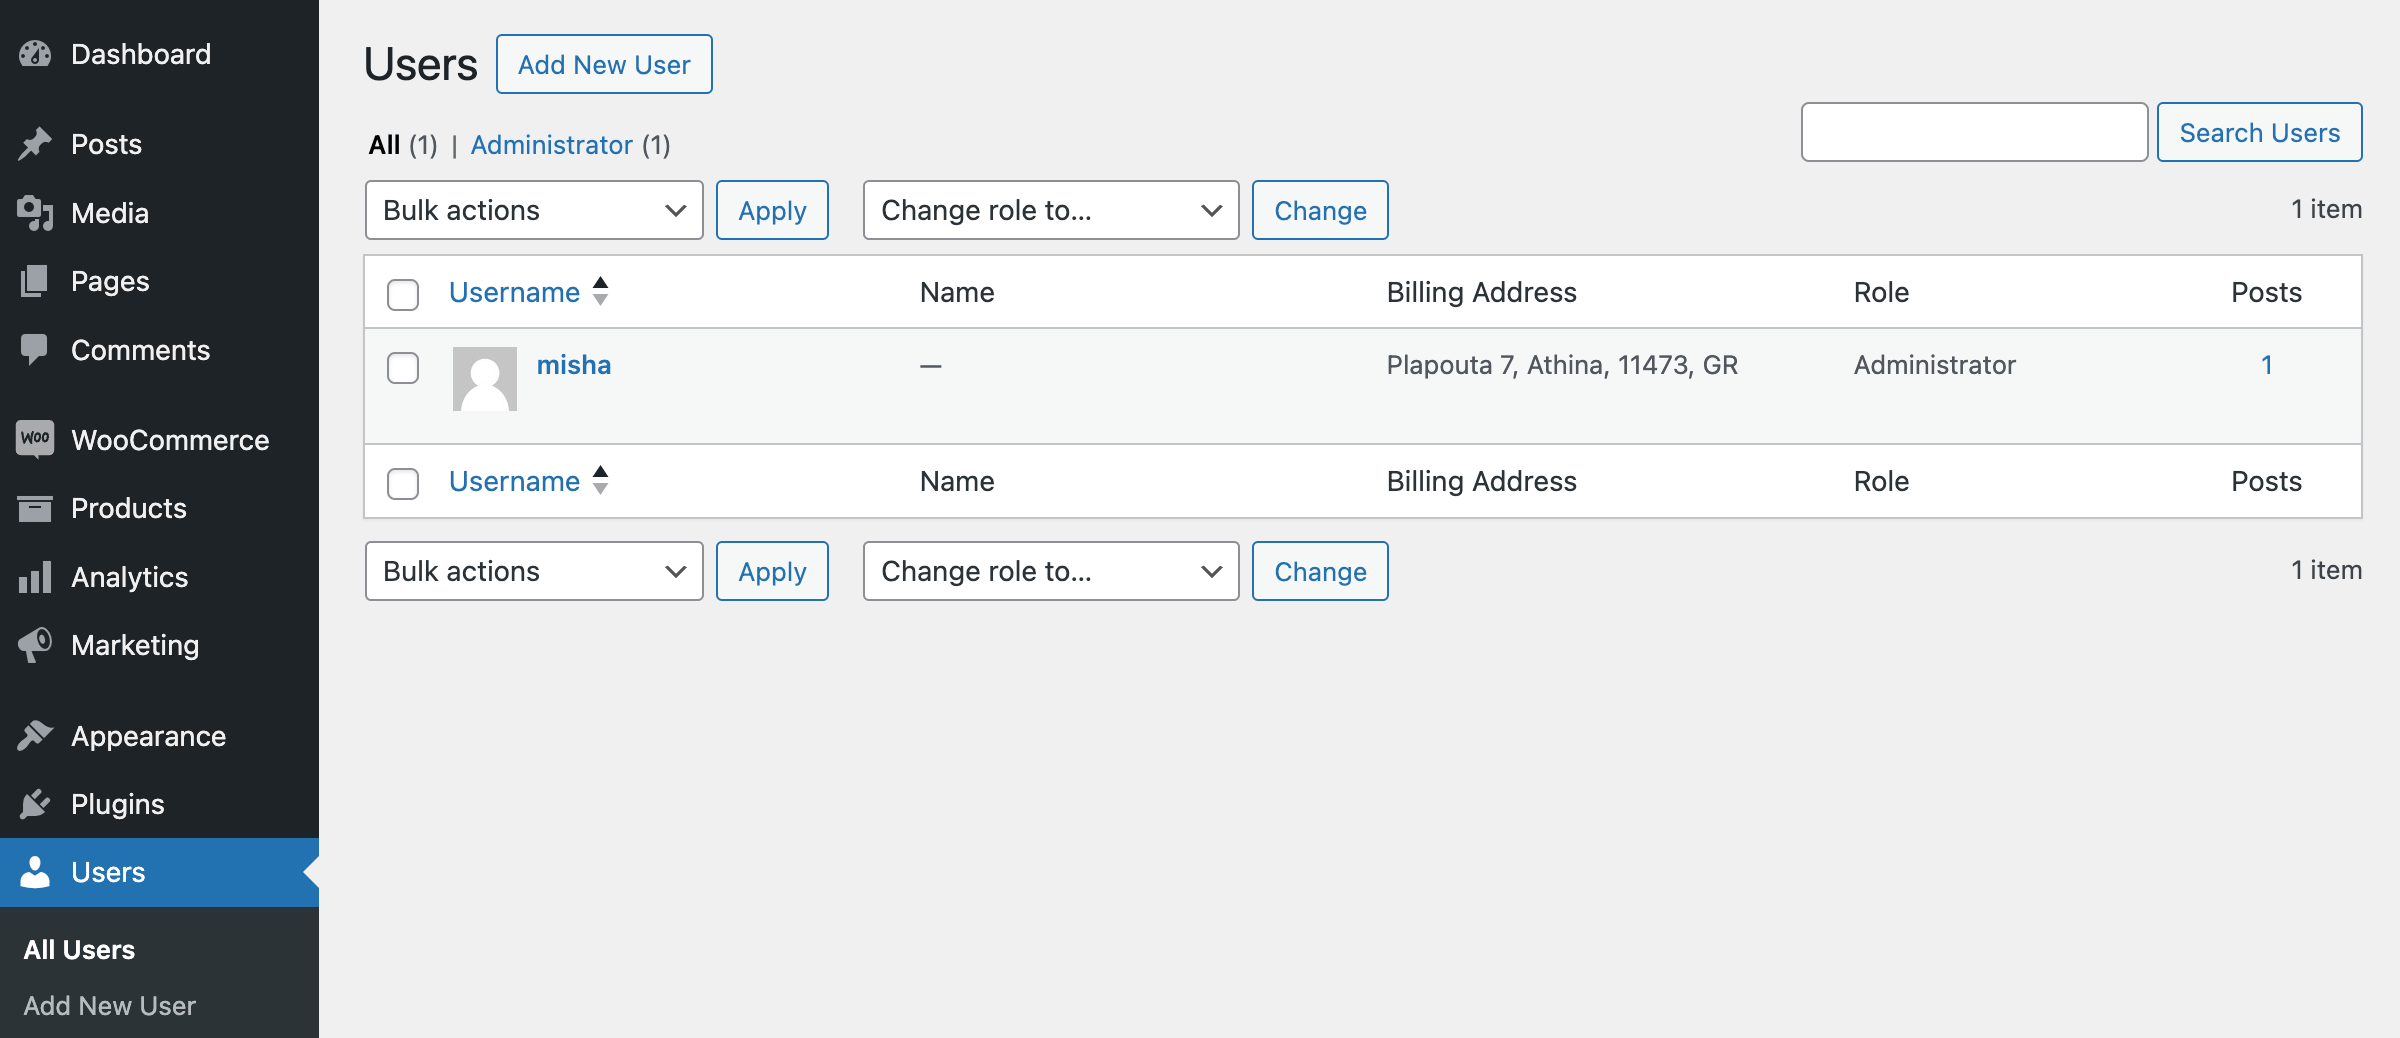
Here is the code that implements this feature:
add_filter( 'manage_users_columns', 'wprs_billing_address_column' );
function wprs_billing_address_column( $columns ) {

	return array_slice( $columns, 0, 3, true ) // 3 columns before
	+ array( 'billing_address' => 'Billing Address' ) // our column is 4th
	+ array_slice( $columns, 3, NULL, true );

}

add_filter( 'manage_users_custom_column', 'wprs_populate_address', 10, 3 );
function wprs_populate_address( $row_output, $column_name, $id ) {

	if( 'billing_address' === $column_name ) {

		$address = array();
		if( $address_1 = get_user_meta( $id, 'billing_address_1', true ) ) {
			$address[] = $address_1;
		}

		if( $address_2 = get_user_meta( $id, 'billing_address_2', true ) ) {
			$address[] = $address_2;
		}

		if( $city = get_user_meta( $id, 'billing_city', true ) ) {
			$address[] = $city;
		}

		if( $postcode = get_user_meta( $id, 'billing_postcode', true ) ) {
			$address[] = $postcode;
		}

		if( $country = get_user_meta( $id, 'billing_country', true ) ) {
			$address[] = $country;
		}

		$row_output = join( ', ', $address );
	}

	return $row_output;

}