Shipment tracking is an essential feature for any e-commerce website. With this functionality, customers can stay updated on their order’s progress in real-time and have reasonable expectations for delivery. Adding shipment tracking to WooCommerce can significantly enhance the customer experience and help your online business thrive.
In this article, I’ll explain why shipment tracking is so important, show you how to set it up in WooCommerce, and recommend some excellent tracking plugins.
Why Shipment Tracking is Critical
Imagine your order has shipped, but you have no idea where it is. You’d likely feel anxious and might even start to doubt the store owner, fearing a scam. This is exactly why you need tracking: to put your customers at ease.
Here are several other key reasons why shipment tracking is indispensable:
- Keeps customers informed about order status, increasing transparency.
- Improves customer satisfaction and the overall shopping experience.
- Builds trust between customers and your brand.
- Provides a competitive advantage for your business.
- Reduces customer inquiries and support load.
- Minimizes shipping errors through automation.
How to Set Up WooCommerce Shipment Tracking
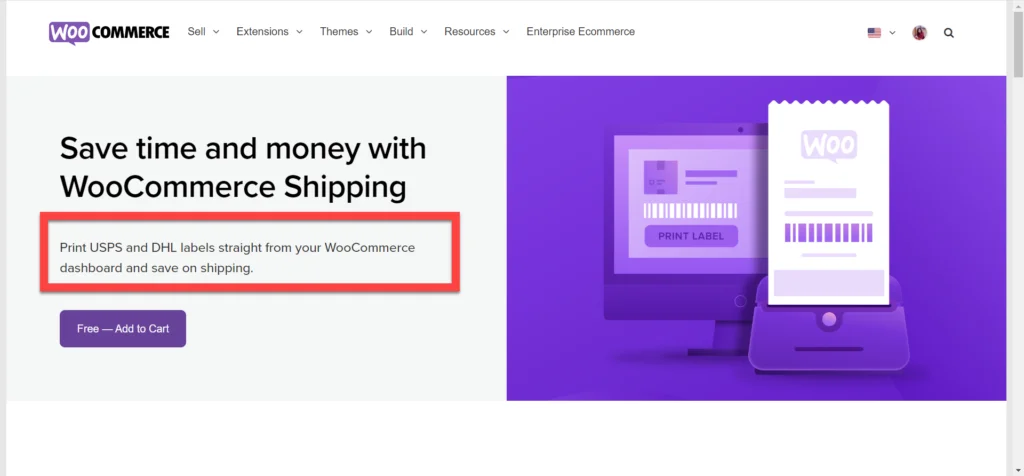
WooCommerce comes with a default shipping extension called WooCommerce Shipping. Unfortunately, it only offers basic options and doesn’t allow you to provide full tracking info to customers directly. Moreover, it currently only supports USPS and DHL. This means if you are using other carriers, this extension isn’t very helpful. Therefore, we won’t be using it here.
While many plugins are available for WooCommerce shipment tracking, I highly recommend using the Advanced Shipment Tracking (AST) plugin. It offers the practical features I’ll introduce in the next section.
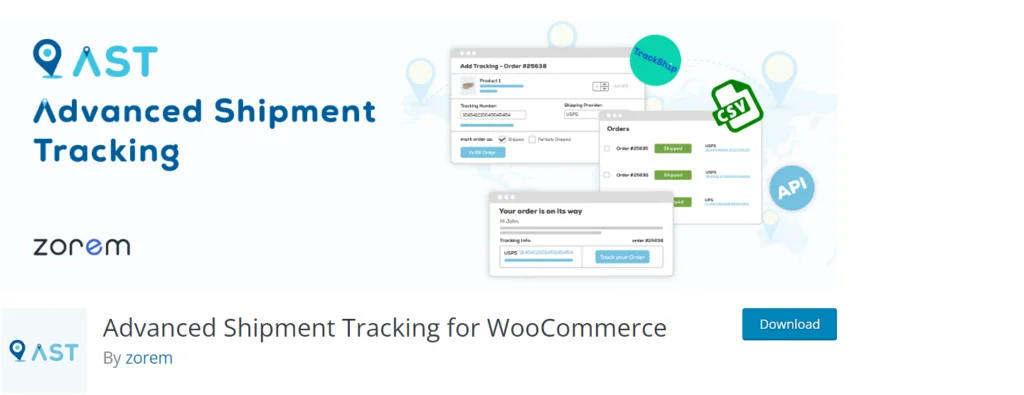
Advanced Shipment Tracking for WooCommerce
Advanced Shipment Tracking for WooCommerce is a free plugin that allows you to add tracking functionality to orders. It currently boasts over 60,000+ active installations and supports over 300 shipping providers worldwide. You can also customize tracking info, email templates, and order statuses.
Plugin Features
- Allows you to add shipping tracking data to order details pages and emails.
- Choose from a wide range of predefined shipping companies.
- Syncs with TrackShip.
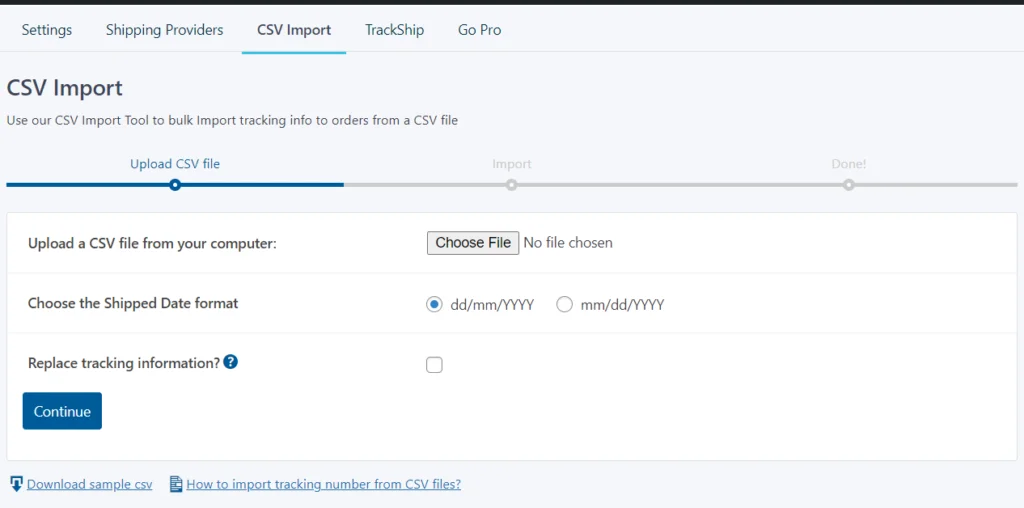
- Allows batch importing of tracking details via CSV.
- Permits adding multiple tracking numbers to a single order.
- Adds custom order statuses.
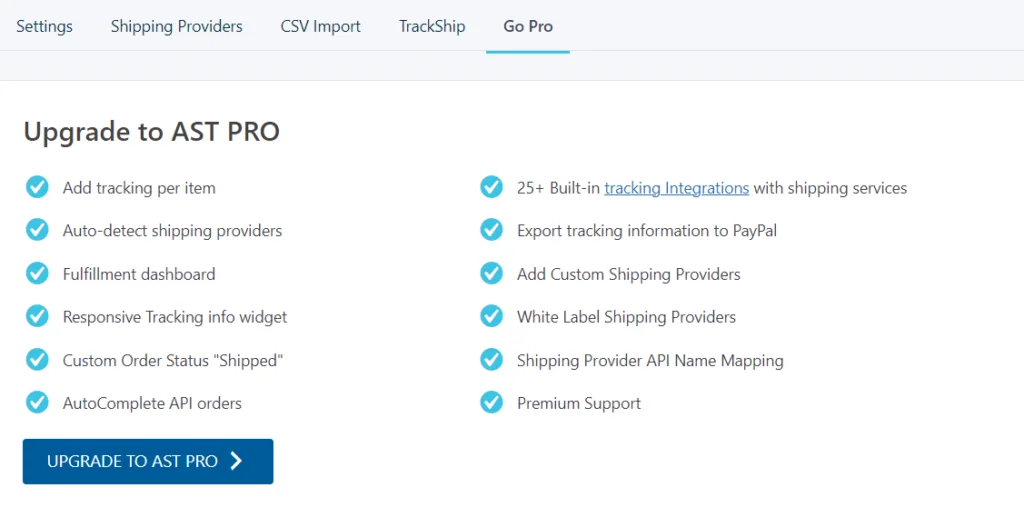
If you need even more advanced features, you can purchase Advance Shipment Tracking Pro for $129.00/year.
Step 1: Install and Activate the Plugin
The first step is to install and activate the plugin.
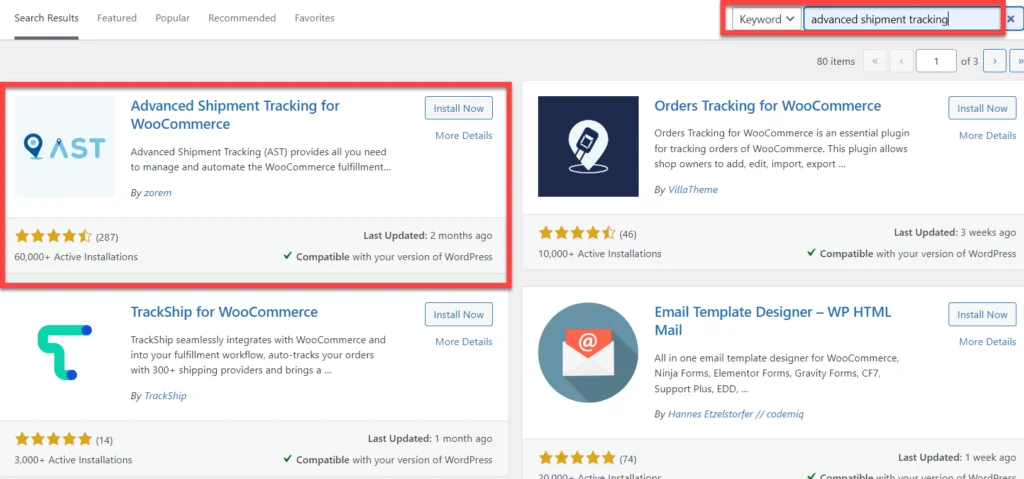
- Go to WooCommerce Dashboard → Plugins → Add New Plugin;
- Enter “Advanced Shipment Tracking” in the search box;
- Click the Install button, then Activate the plugin.
Step 2: Configure Shipment Tracking
- After activating the plugin, you’ll see a Shipment Tracking option added under WooCommerce.
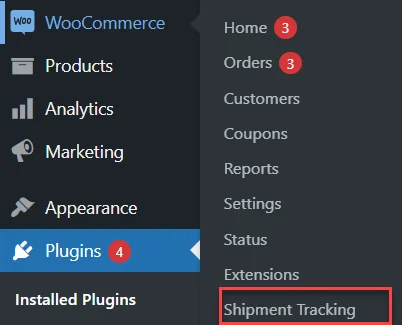
- Click on “Shipment Tracking“. You will be redirected to the following page:
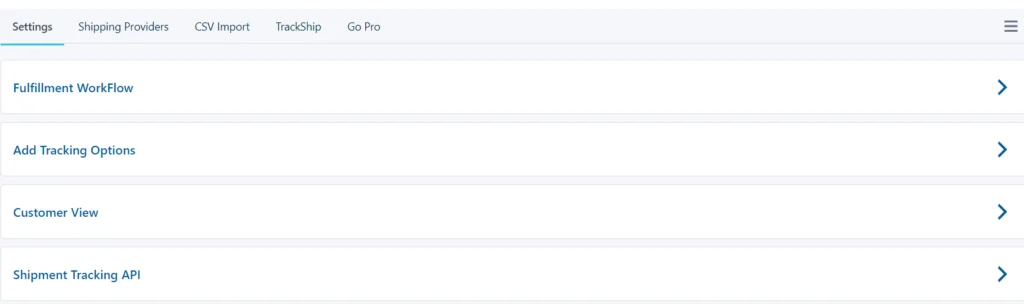
- You can explore these sections and make adjustments based on your needs.
- In the settings section, there are 4 subcategories:
- Execute Workflow: You can choose fonts and colors to display “Shipped” or “Partially Shipped” statuses.

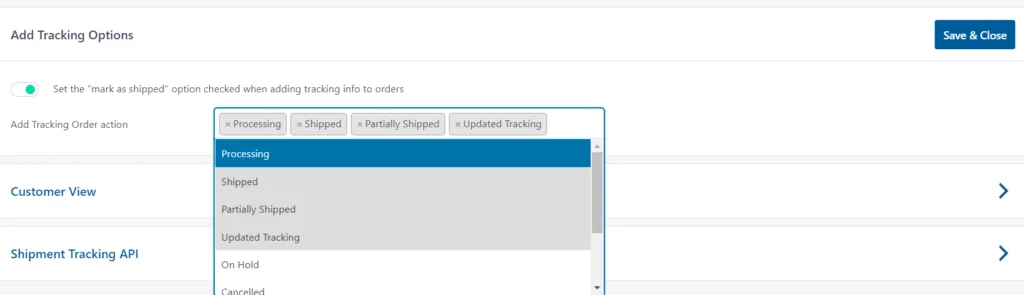
- Add Tracking Options: You can add tracking info here and select the options you want to display. Click save when finished.
- Customer View: You can edit options in this section to provide a better experience for your customers.

- Shipment Tracking API: You can change the date format here.

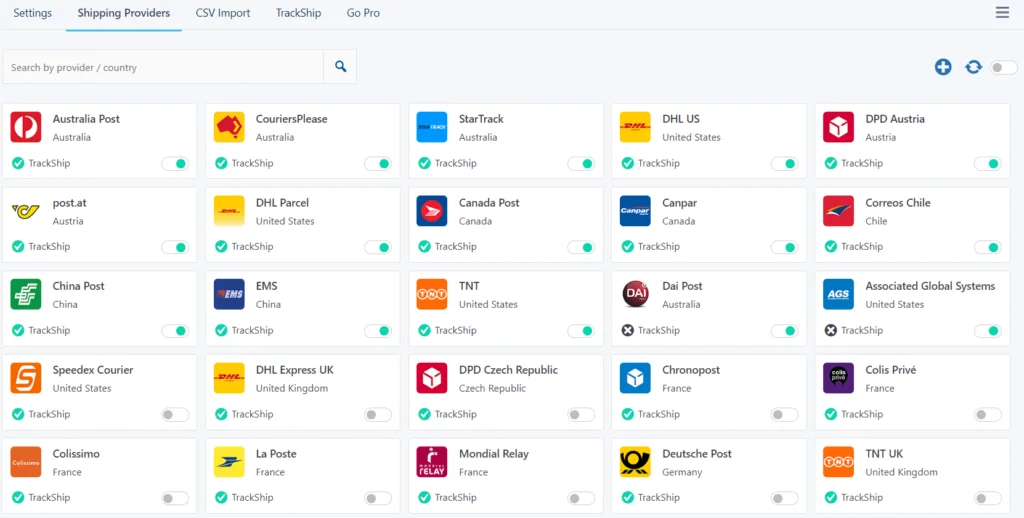
- Next is the shipping providers section. You need to select relevant carriers from the dropdown menu. AST comes with over 400 shipping companies with predefined tracking links.
- CSV Import allows you to batch import tracking info for multiple orders.
- You can integrate TrackShip with the AST plugin to get a full shipment tracking dashboard.

- If you need expanded features, you can upgrade to the Advanced Shipment Tracking Pro version at any time.
Step 3: Add Shipment Tracking to an Order
Once setup is complete, you can start adding tracking info to your orders. To do this, please:
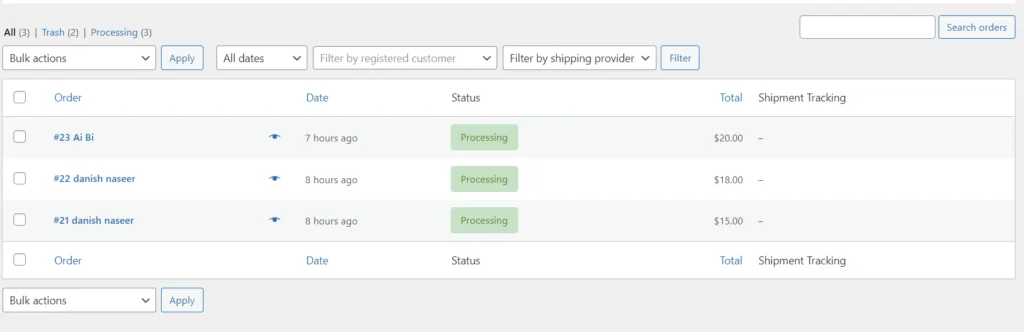
- Go to WooCommerce Dashboard → Orders;
- Choose an order where you want to add tracking.
- You’ll see the Shipment Tracking section within the order details.
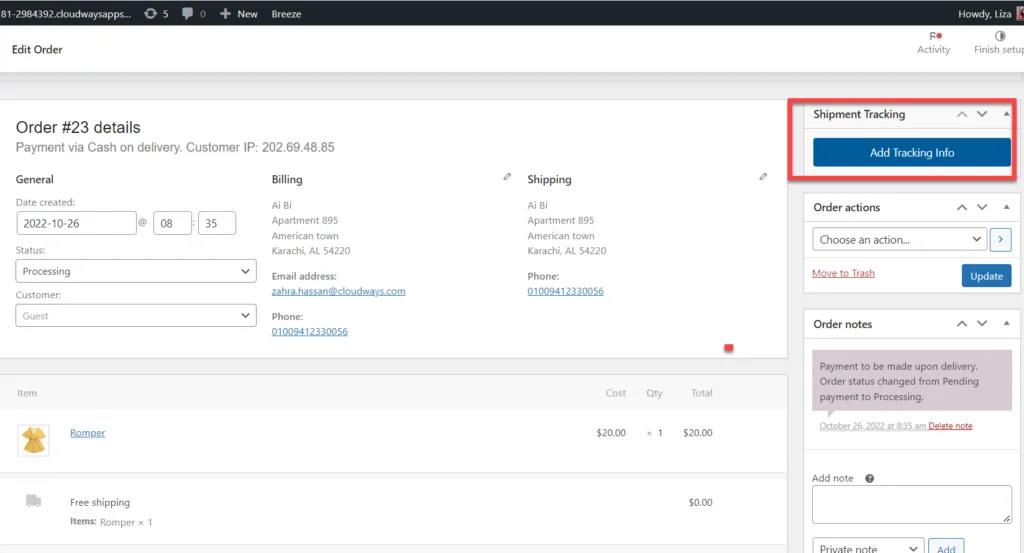
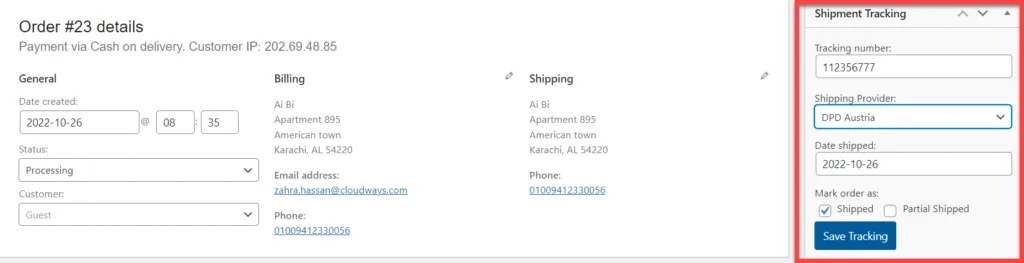
- Click on Add Tracking Info.
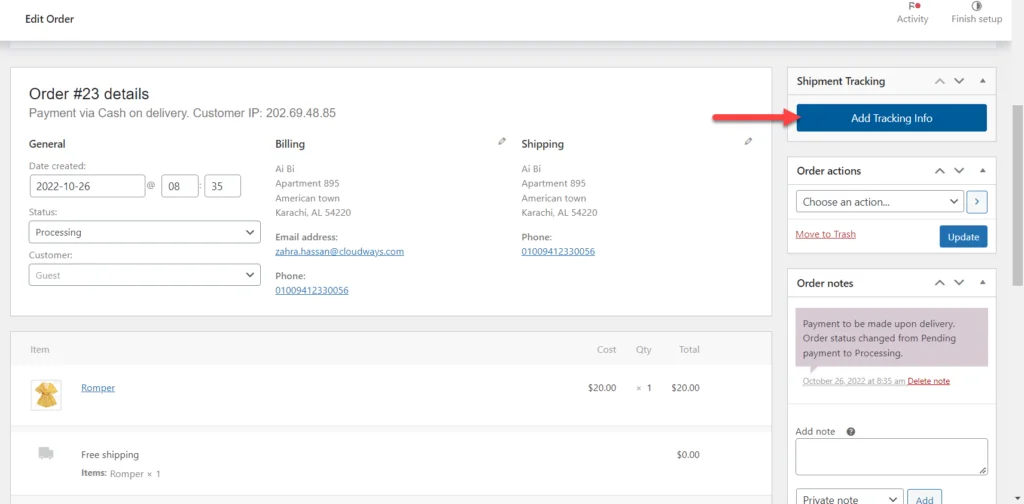
- Fill in the details, then click Save Tracking.
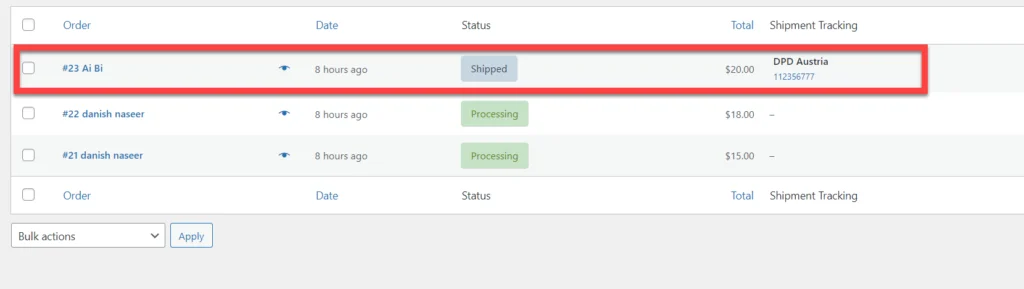
Step 4: Verify Order Tracking
- To check if the tracking is working, go to WooCommerce Dashboard → Orders;
- If you see shipment details with a tracking ID and carrier information, the plugin is correctly configured.
Enabling Holistic Order Tracking in WooCommerce
As a WooCommerce store owner, you likely want to track all outgoing shipments. This makes it easy to manage your orders and avoid potential logistical nightmares.
While many plugins can help with this (like AfterShip or ShipStation), I still recommend TrackShip for WooCommerce. It integrates seamlessly with the Advanced Shipment Tracking plugin we used earlier.
Here’s how to use this plugin:
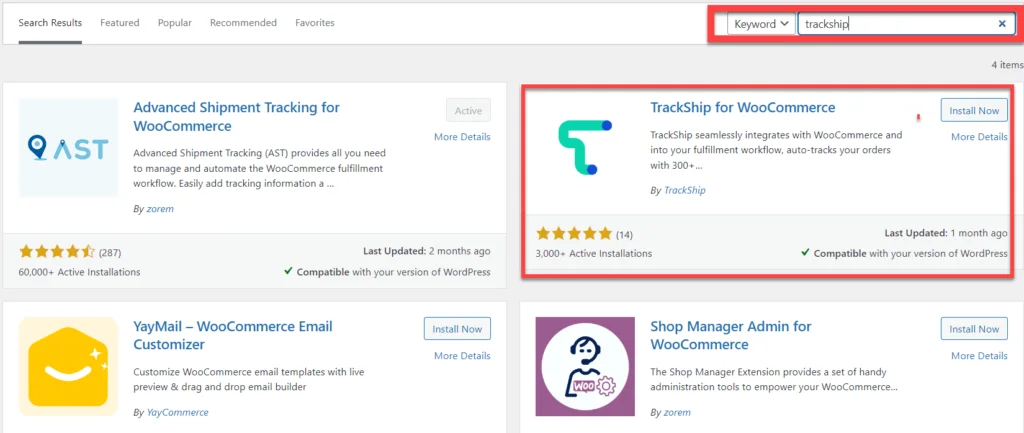
Step 1: Install and Activate the Plugin
- Go to WooCommerce Dashboard → Plugins → Add New Plugin;
- Enter “TrackShip for WooCommerce” in the search box;
- Click Install, then Activate.
Note: You cannot install the TrackShip plugin if you haven’t activated a compatible shipment tracking plugin first.

Step 2: Connect Your Store with TrackShip
- After activation, you’ll see a TrackShip option in the dashboard.
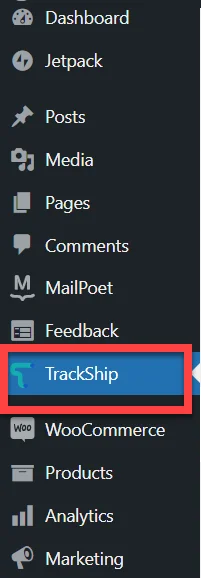
- Click it, and the system will prompt you to connect your WooCommerce store.
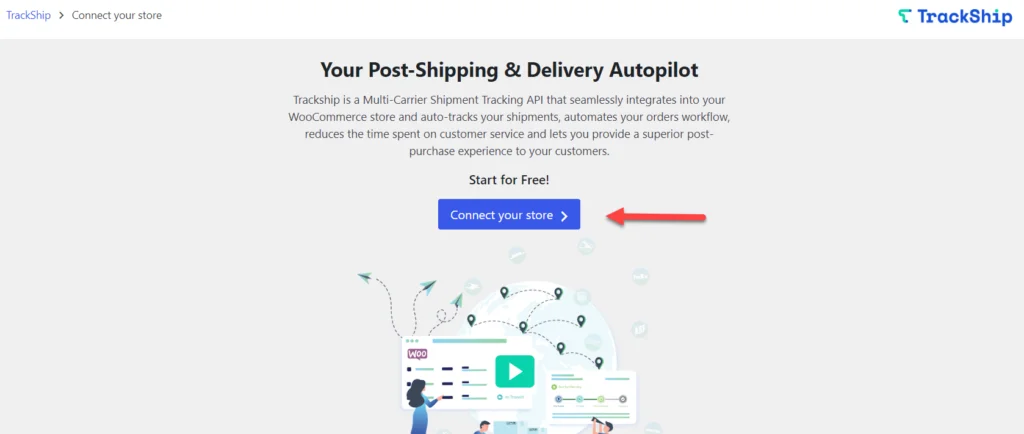
- Click “Connect Your Store” to go to the TrackShip dashboard.
- Click the Connect Store button.
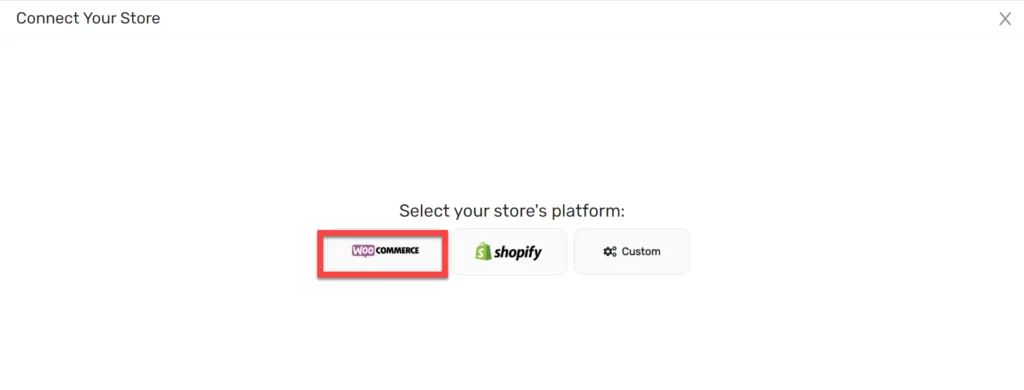
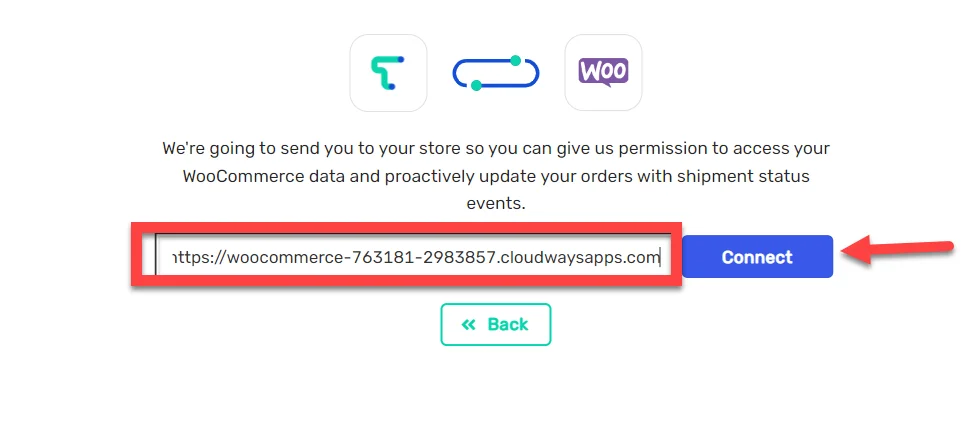
- Select your store platform. Here, I’m choosing WooCommerce.
- Insert your store URL and click Connect.
- Click the Approve button.
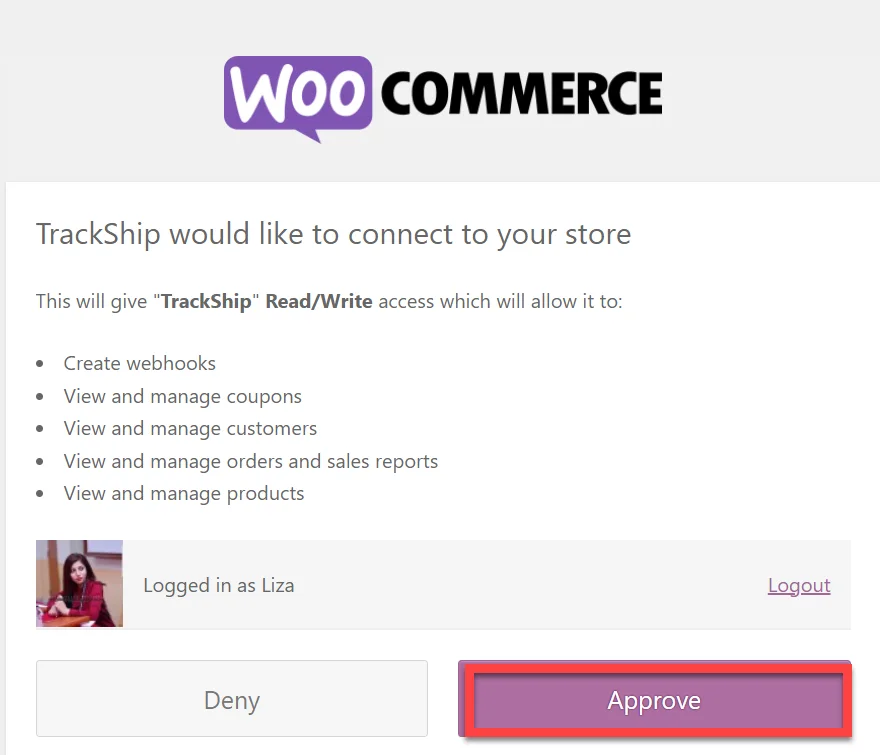
That’s it! You’ve successfully connected your WooCommerce store to TrackShip.
Step 3: Configure the TrackShip Plugin
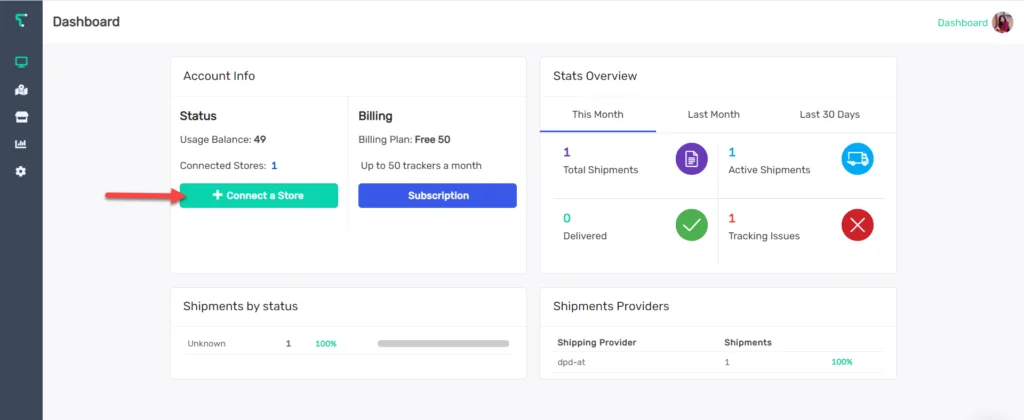
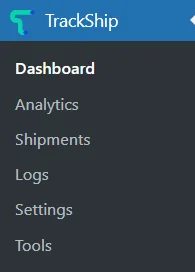
- Once connected, you can access the TrackShip dashboard directly from your WooCommerce admin.
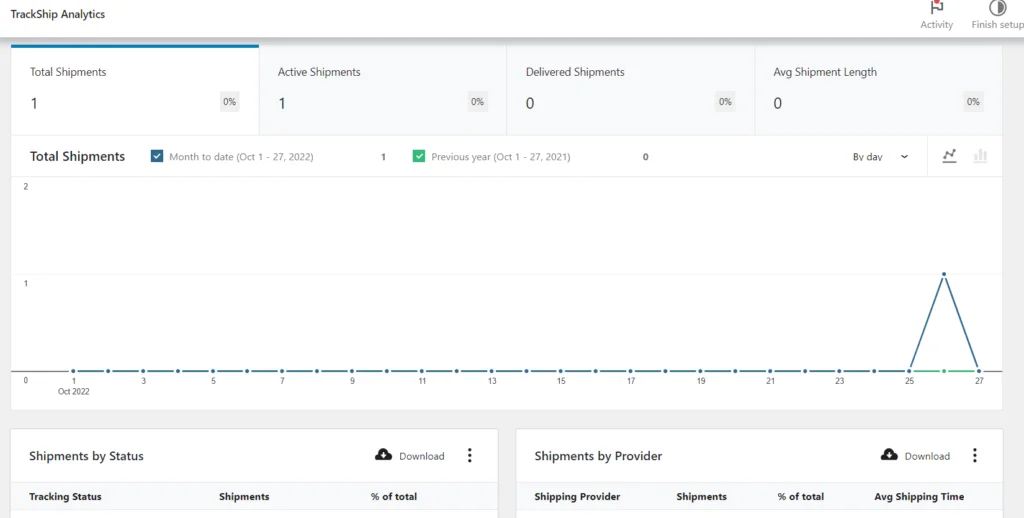
- It provides a visual overview of your shipment and delivery details.
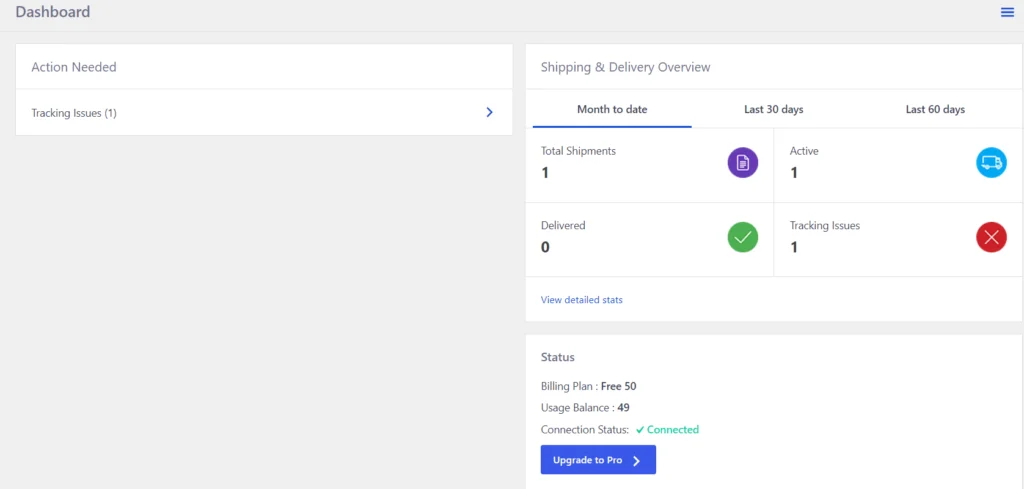
- You can also view TrackShip analytics, which use charts and numbers to analyze your shipping and delivery performance.
With TrackShip, you no longer need to worry about manual order updates. It automatically tracks completed orders and proactively updates them when shipping status changes, right until delivery to the customer.
9 Best Shipment Tracking Plugins to Consider
Besides Advanced Shipment Tracking, there are several other excellent plugins worth trying based on your specific needs:
- WooCommerce ShipStation Gateway
- WooCommerce Shipment Tracking Pro – PluginHive
- ELEX WooCommerce USPS Shipping Plugin with Print Label
- WooCommerce Advanced Shipping
- WooCommerce Table Rate Shipping Plugin
- Table Rate for WooCommerce
- Conditional Shipping for WooCommerce
- Advanced Shipment Tracking for WooCommerce
- Flat Rate Shipping Plugin For WooCommerce
- WooCommerce Weight-Based Shipping Plugin
Summary
Adding shipment tracking to your orders can resolve many customer concerns. This article covered the importance of order tracking and provided a step-by-step guide to setting up tracking in WooCommerce using the Advanced Shipment Tracking plugin. If you have any questions, feel free to leave a comment below.