It is no secret that WordPress can consume a fair amount of server resources, especially when a site uses a heavy premium theme. Without proper optimization, page load times can become unbearably slow.
Anyone who cares about building a serious site knows that speed affects SEO and conversion rates. For people buying traffic through ads, performance can directly affect revenue.
This article uses the Avada theme as an example and explains how to optimize a WordPress site properly and improve page speed in practical ways.
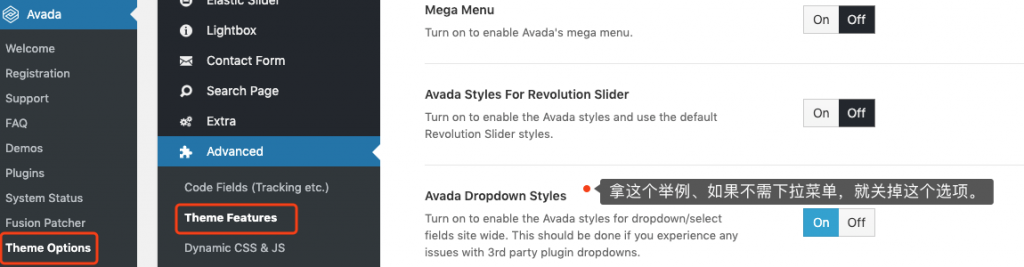
1. Remove unnecessary front-end files
Avada provides options that let you disable features you do not actually use. Turning off unneeded features reduces the number of front-end files that have to load and therefore reduces HTTP requests.
Open the Avada menu in the dashboard, go to Theme Options → Advanced → Theme Features, and review each option carefully. If the site does not use a feature, turn it off.
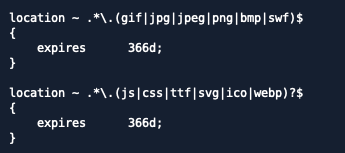
2. Increase the browser cache lifetime
Browsers can cache static resources such as images, CSS, and JavaScript on the visitor’s device. When the visitor returns, those files can be loaded locally instead of being downloaded again from the server.
That browser cache has an expiration time. For static assets that do not change often, extending the cache lifetime reduces repeated downloads. Google commonly recommends a cache lifetime of at least one year for suitable static assets.
In an Nginx virtual host configuration, add cache rules like the ones shown below. The article focuses on Nginx, but Apache can be configured similarly if needed.
3. Use an efficient cache plugin
Server-side caching is essential if you want WordPress to load quickly. Depending on where cached data is stored, WordPress caching can be divided into memory cache, disk cache, and database cache. In terms of raw speed, memory cache is usually fastest, followed by disk cache, then database cache.
WP Super Cache is a well-known plugin that uses disk caching, and there are plenty of guides for it online, so this article does not go into that setup.
Instead, one lighter recommendation is Cachify. It can store cache data in Memcached, on disk, or in the database, and its configuration is relatively simple, which reduces the risk of creating performance problems through bad settings.
If the server supports Memcached, using Cachify with memory-based caching is usually the best option. The site has a separate guide for that setup at https://wphrefs.com/use-the-cachify-plugin-to-cache-wordpress-pages-in-memcached-for-instant-loads/.
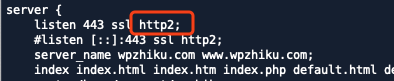
4. Use HTTP/2
One major rule of HTTP/1.x optimization was to reduce the number of requests because browsers could only download a small number of files in parallel. That is why people used to merge CSS and JavaScript files aggressively.
The downside is that merged files become larger, so you then have to balance fewer requests against heavier downloads.
With HTTP/2, that tradeoff becomes much less painful because one of its biggest advantages is multiplexing. In practical terms, the browser can fetch many more files concurrently, so reducing requests is no longer quite as critical as it was under HTTP/1.x.
Most modern browsers already support HTTP/2. If your server enables it, you can take advantage of that and simplify some front-end optimization choices. On Nginx, adding HTTP/2 support is usually very straightforward.
If you are not comfortable editing the server configuration yourself, ask the hosting provider to enable HTTP/2 for you. Since HTTP/2 can also reduce resource waste on the server side, a good hosting provider should be happy to help.
If the server already supports HTTP/2, you can disable Avada’s JS Compiler setting to help the site load faster.
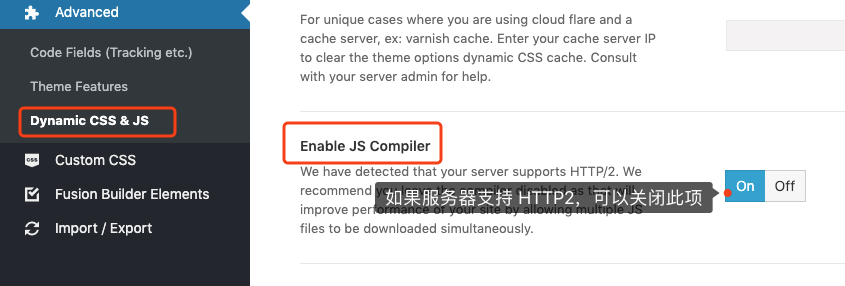
One important note: disabling that option may lower your PageSpeed score or the scores reported by similar tools. That does not necessarily mean the site is slower in real-world use. It often just means the testing tool is still optimized for older HTTP/1.x assumptions.
5. Deploy the PageSpeed module
The PageSpeed server module can automatically perform several front-end optimizations, such as delayed JavaScript loading, lazy image loading, and image compression. Deploying PageSpeed on the server can create a lot of gains for relatively little day-to-day effort.
The exact deployment process is outside the scope of this article, but if you are comfortable working at the server level you can refer to the related guide at https://wphrefs.com/use-ngx-pagespeed-to-optimize-front-end-pages-and-speed-up-wordpress/. If not, ask the hosting provider or a qualified server engineer to help.
6. Use a CDN to offload static resources
A CDN caches static files on servers closer to the visitor so those files can load faster. CDNs generally come in two models: full-site CDNs and static-asset CDNs. Cloudflare is a typical full-site CDN, while providers like KeyCDN and CDN77 are better examples of static-asset CDNs.
For WordPress, a static-asset CDN is often the better choice. Let images, CSS, and JavaScript go through the CDN while keeping dynamic pages on the origin server. That avoids sending unnecessary cookies through the CDN and can improve performance.
Once the CDN provider gives you a CDN URL, configuration is usually simple. The site already has a related guide at https://wphrefs.com/wp-cdn-rewrite-qiniu-colud/.
Common international static CDNs include KeyCDN and CDN77. Common choices in China include Alibaba Cloud CDN, Tencent Cloud CDN, Qiniu, and UpYun.
7. Host videos on your own site when appropriate
Some corporate and product sites embed videos from YouTube. YouTube itself can deliver video quickly, but embedding it also brings in additional JavaScript, and that can slow down the site.
If the site only needs a small number of videos and the server has enough traffic capacity, hosting those videos directly on the site can be a practical alternative. That avoids loading YouTube’s scripts and can improve page speed.
Adding a video in WordPress is simple. You can insert it into the content editor much like an image. In Avada, for example, start by adding a Text Block in Fusion Builder.
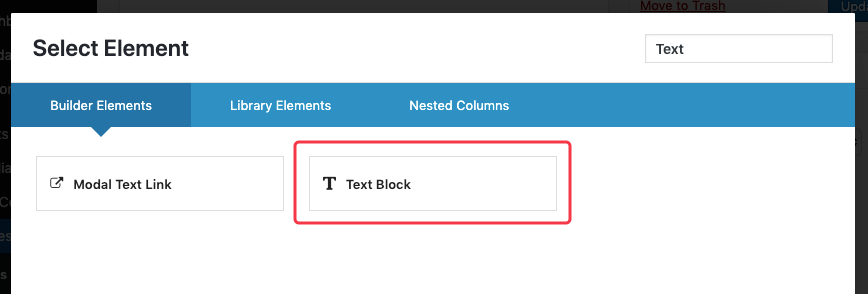
Then edit that Text Block and click the Add Media button in the popup editor.
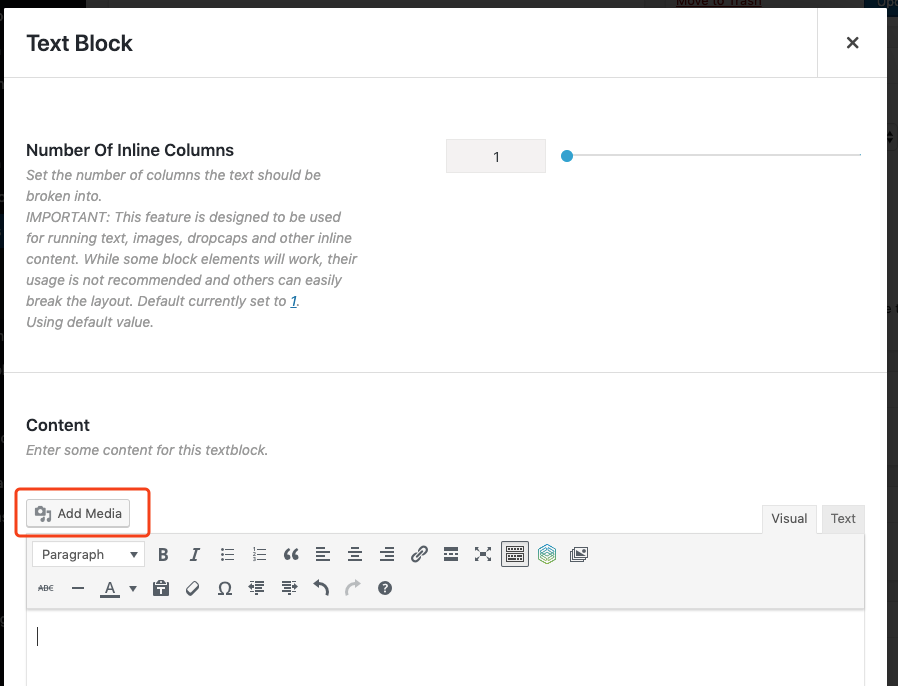
After that, upload and insert the video file just as you would with an image. The result looks like this:
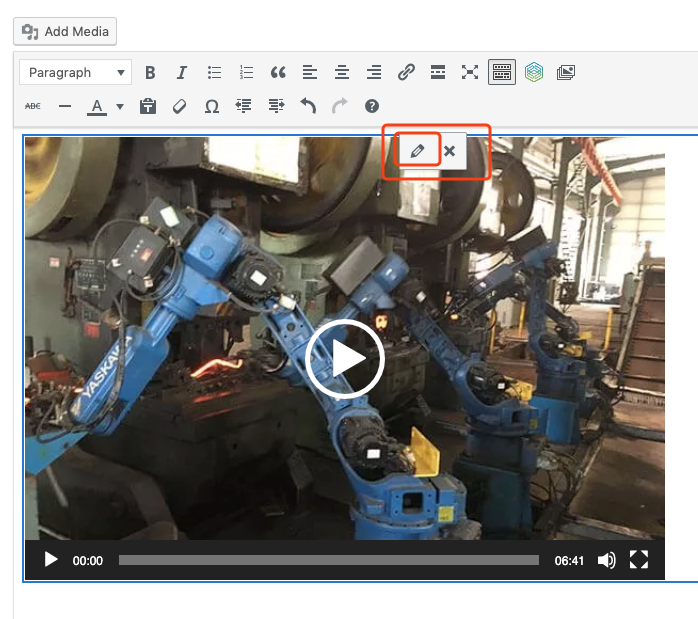
If you want to add a poster image for the video, click the inserted video and then click the small pencil icon highlighted in the screenshot. That opens the settings panel shown below.
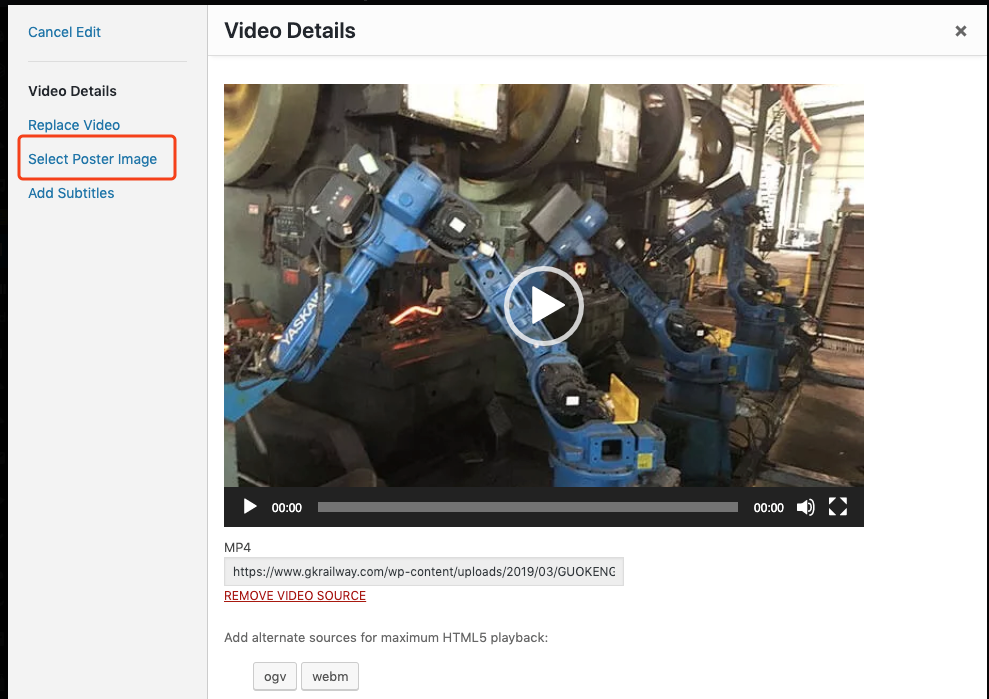
Click Select Poster Image, choose or upload an image, and then confirm the selection. The steps are simple enough that they do not need additional screenshots here.
After going through this kind of optimization pass, it is common to see a noticeable improvement in load time. Once the site has run that way for a while, metrics such as bounce rate and pages per visit often improve as well.