By default, WordPress uses the third-party service Gravatar to provide user photos (avatars). However, relying on an external service for user avatars has several disadvantages—particularly regarding privacy, external dependency, and performance. In this article, I will show you how to set images from your WordPress media library as user avatars.
In this tutorial, we will primarily focus on user profile avatars (rather than commenters), explain the drawbacks of Gravatar, and demonstrate how to host your own avatars locally.
Where are User Avatars Displayed?
In WordPress, user avatars are displayed in several key areas. Additionally, many themes and plugins call the avatar function to show specific user-related information:
- WordPress Admin Toolbar (Core)
- User Dashboard (Core)
- Avatar Gutenberg Block (Core)
- Post Author Bio (Theme dependent)
- Post Meta Headers (Theme dependent)
- Membership Plugins
- Account Pages (e.g., WooCommerce My Account)
- Author Grids (e.g., User Grid elements in the Total Theme)
Why You Shouldn’t Use Gravatar for User Avatars
The main reason to avoid Gravatar is the additional overhead of fetching and displaying images from a third-party site. This can slow down page load times and decrease your Google PageSpeed score. While this is primarily a front-end concern, improving back-end speed is always beneficial as well.
Here are other reasons why you might prefer locally hosted avatars over Gravatar:
- Faster overall site load times.
- Improved Core Web Vitals and PageSpeed scores.
- Eliminates dependency on the Gravatar service availability.
- Greater control over image format, compression, and resolution.
- Easier setup and updates directly within WordPress.
How to Use a Media Library Image as a User Avatar
Using your own images as avatars in WordPress is quite simple. While there are several ways to modify the avatar output, I personally recommend using the pre_get_avatar_data hook. This allows you to return your custom URL before WordPress even makes a request to Gravatar.com.
Below is an example code snippet showing how to use an image from the media library to override a specific user’s avatar:
/**
 * Return a media library image for a user's avatar.
 */
add_filter( 'pre_get_avatar_data', static function( $data, $id_or_email ) {
	// Process the user identifier.
	$user = false;
	if ( is_numeric( $id_or_email ) ) {
		$user = get_user_by( 'id', absint( $id_or_email ) );
	} elseif ( $id_or_email instanceof WP_User ) {
		$user = $id_or_email;
	} elseif ( $id_or_email instanceof WP_Post ) {
		$user = get_user_by( 'id', (int) $id_or_email->post_author );
	} elseif ( $id_or_email instanceof WP_Comment && is_avatar_comment_type( get_comment_type( $id_or_email ) ) ) {
		if ( is_numeric( $id_or_email->user_id ) ) {
			$user = get_user_by( 'id', (int) $id_or_email->user_id );
		} elseif( is_email( $id_or_email->user_id ) ) {
			$user = get_user_by( 'email', $id_or_email->user_id );
		}
	}

	// Change the avatar for the user with an ID of 1 (generally the main site admin).
	if ( $user && 1 === (int) $user->ID ) {
		// IMPORTANT - Replace 'YOUR_ATTACHMENT_ID' with the actual media ID
		$data['url'] = wp_get_attachment_url( 'YOUR_ATTACHMENT_ID' );
	}

	// Return avatar data.
	return $data;
}, 10, 2 );
The only lengthy part of this code is parsing the $id_or_email variable to identify the user. This is necessary because WordPress allows fetching avatar data via ID, email, or objects, and there isn’t a single global function to unify these inputs.
In this specific snippet, we only modify the URL for the user with ID 1. Make sure to replace YOUR_ATTACHMENT_ID with the specific ID of the image you want to use from your media library.
How to Find a User ID
To find the User ID for the code above, log in to your WordPress dashboard and go to Users. Click on the user you wish to modify to enter their profile editing screen. You will find the ID in the URL bar, formatted like this: your-site.com/wp-admin/user-edit.php?user_id={ID}.
How to Find an Image ID
To find the ID of any image stored in your WordPress site, go to the Media Library and click on the image you want to use. You will see the ID in the URL: your-site.com/wp-admin/post.php?post={ID}.
How to Add a Custom Avatar Setting to the User Profile Screen
The manual code override above is perfect for specific one-off edits. However, for sites with many users, you may want to add a field to the WordPress admin profile page so you can define avatars without touching code every time.
The following snippet adds a “Custom Avatar” field to the user editing interface. This field accepts either a Media Library ID or a full URL to any image you wish to use as an avatar.
/**
 * Custom User Avatars Class.
 */
class Wenprise_Custom_User_Avatars {

	public function __construct() {
		add_filter( 'user_contactmethods', [ $this, 'filter_user_contactmethods' ] );
		add_filter( 'pre_get_avatar_data', [ $this, 'filter_pre_get_avatar_data' ], 10, 2 );
	}

	public function filter_user_contactmethods( $methods ) {
		$methods['custom_avatar'] = esc_html__( 'Custom Avatar', 'text-domain' );
		return $methods;
	}

	public function filter_pre_get_avatar_data( $data, $id_or_email ) {
		$user = false;
		if ( is_numeric( $id_or_email ) ) {
			$user = get_user_by( 'id', absint( $id_or_email ) );
		} elseif ( $id_or_email instanceof WP_User ) {
			$user = $id_or_email;
		} elseif ( $id_or_email instanceof WP_Post ) {
			$user = get_user_by( 'id', (int) $id_or_email->post_author );
		} elseif ( $id_or_email instanceof WP_Comment && is_avatar_comment_type( get_comment_type( $id_or_email ) ) ) {
			if ( is_numeric( $id_or_email->user_id ) ) {
				$user = get_user_by( 'id', (int) $id_or_email->user_id );
			} elseif( is_email( $id_or_email->user_id ) ) {
				$user = get_user_by( 'email', $id_or_email->user_id );
			}
		}

		if ( $user && $custom_avatar = get_user_meta($user->ID, 'custom_avatar', true ) ) {
			if ( is_numeric( $custom_avatar ) ) {
				$data['url'] = esc_url( wp_get_attachment_url( $custom_avatar ) );
			} else {
				$data['url'] = esc_url( $custom_avatar );
			}
		}

		return $data;
	}

}

new Wenprise_Custom_User_Avatars;
The resulting field in the WordPress backend will look like this:
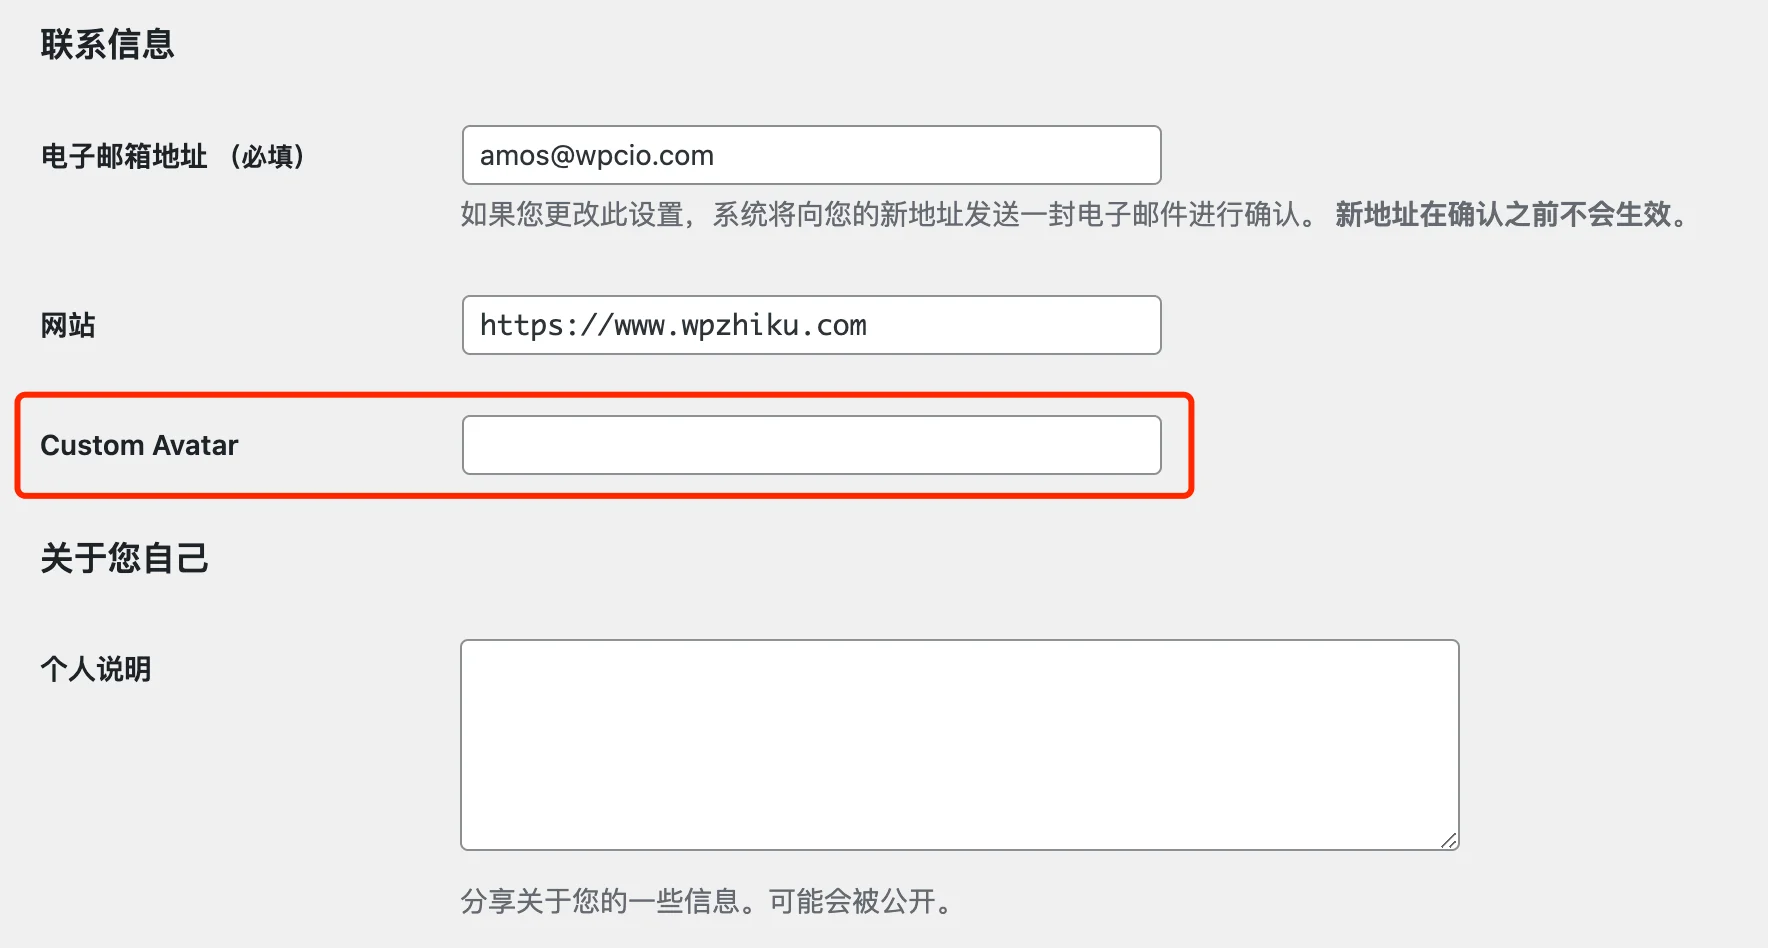
In this tutorial, the custom avatar field is a simple text field because WordPress does not have a native media library picker for user profiles. While you could add a JavaScript-based picker button, it adds complexity and weight to the codebase; for most users, simply pasting an ID or URL is more efficient.
Conclusion
Using locally hosted images for WordPress user avatars is a great idea and highly recommended for both privacy and performance. While WordPress does not include this feature natively (likely to promote their Gravatar service), a small amount of code makes it easy to take full control of your user profile photos.
If you have any questions about the techniques or code used in this article, feel free to leave a comment below—let’s discuss!